Globus is a worldwide network of 'endpoints', allowing efficient, direct transfer of data. Globus is installed on UNSW's Katana HPC system and is rolling out to many Australian research institutions.
Globus is best used for:
- Large data transfers - Your data is transferred directly between the source and destination systems while Globus tunes performance parameters, maintains security, monitors progress, and validates correctness.
- Automating transfers - You can schedule transfers, and more complicated workflows can be accomplished with some Globus configurations.
- Transferring data to other Globus users outside of UNSW - Other universities and research institutions such as NCI have Globus endpoints, allowing you to access data on those systems.
Katana is set up as a Globus Endpoint, allowing access to data on Katana Scratch and User home directories. You can transfer data from these locations to anywhere else with a Globus endpoint, or to a personal computer set up with a Globus Personal Endpoint.
Transferring data between Katana and a Personal Endpoint
- Install the Globus Connect Personal Endpoint on your local computer. You can get the installer from the Globus site. Log in with your UNSW zID. During this process you will name your personal endpoint, make sure this is memorable as you'll search for it in step 6 and it will be visible publicly so don't include any private information.
- Open the Globus web app, choose UNSW and log in with your UNSW zID
- Click "File Manager" in the left column
- In the box next to "Collection" search for "UNSW Katana" and choose either the Scratch, Home, or CCRC collections. Click "Continue" and authorise with your UNSW zID (you only need to authorise one time per endpoint)
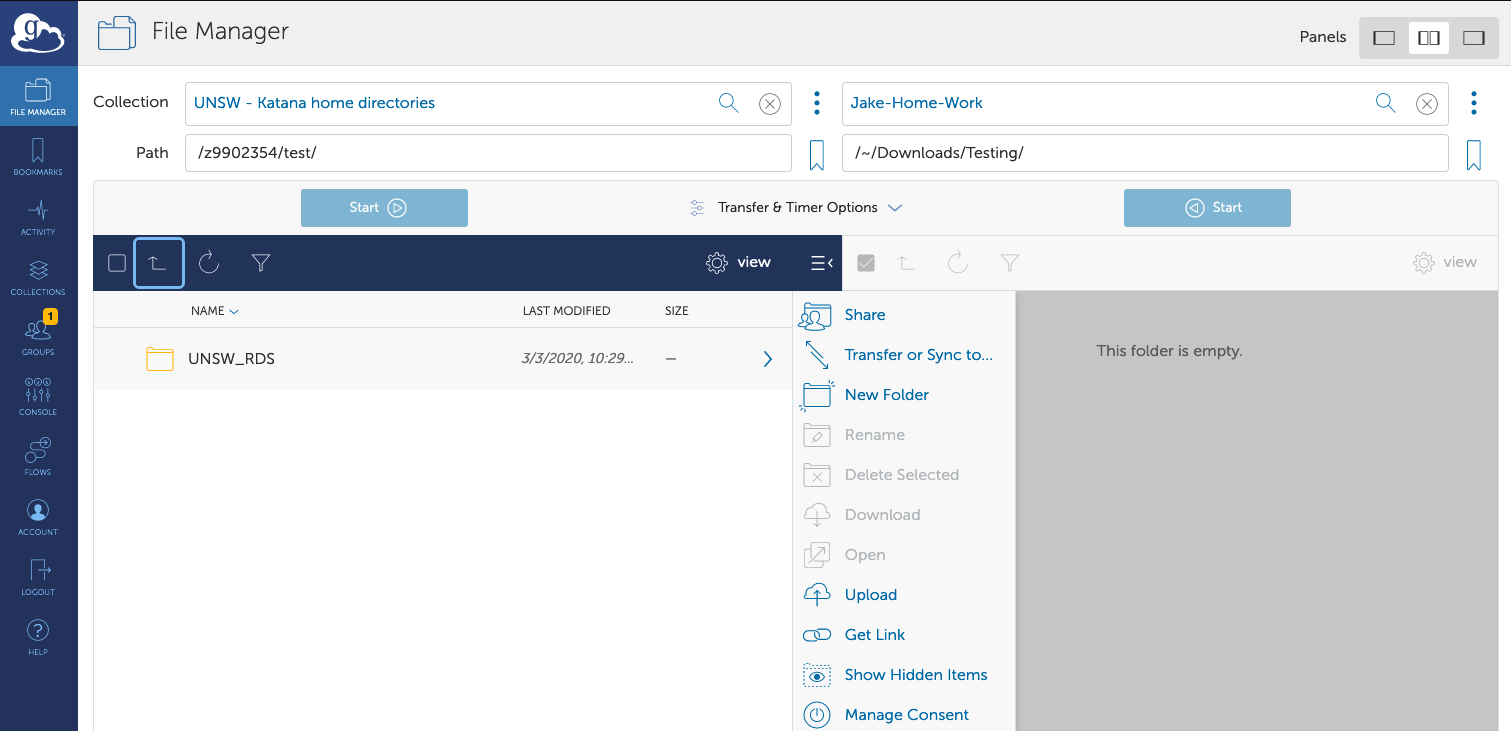
- If you can't see a second search box to the right of the first Collections search click "Transfer or Sync to..." on the right column
- Search for the home collection name you set up in step 1.
- Browse to the files you want to transfer in the windows below, ticking the files and folders you want to transfer on one side and the destination directory on the other. You can choose advanced options by clicking "transfer & timer options".
- When ready you can click "Start" on the side you want to transfer from.
- Your transfer will now begin in the background. You can check the status by clicking "Activity" on the left. You will get an email when the transfer is complete.

NCI currently has a Globus endpoint that can access the /G/Data file system. You cannot currently access Scratch folders with Globus, so you will need to request a /G/Data folder (if you don't have one) and move the data there if you wish to use Globus to transfer that data. You will also need to contact NCI support and request that Globus be enabled for your project. Once this is done NCI will let you know what the endpoint name you need to use will be.
Transferring data from NCI:
- If you want to transfer to a computer without an Endpoint, you will need to install the Globus Connect Personal Endpoint on your local computer. You can get the installer from the Globus site. Log in with your UNSW zID. During this process you will name your personal endpoint, make sure this is memorable as you'll search for it in step 6 and it will be visible publicly so don't include any private information.
- Open the Globus web app, choose UNSW and log in with your UNSW zID.
- Click "File Manager" in the left column
- In the box next to "Collection" search for the collection name given to you by NCI. Click "Continue" and authorise with your UNSW zID (you only need to authorise one time per endpoint)
- If you can't see a second search box to the right of the first Collections search click "Transfer or Sync to..." on the right column
- Search for the home collection name you set up in step 1, or another collection such as UNSW Katana's.
- Browse to the files you want to transfer in the windows below, ticking the files and folders you want to transfer on one side and the destination directory on the other. You can choose advanced options by clicking "transfer & timer options".
- When ready you can click "Start" on the side you want to transfer from.
- Your transfer will now begin in the background. You can check the status by clicking "Activity" on the left. You will get an email when the transfer is complete.